Good embroidery starts long before the needle moves. It starts with the artwork and the way that artwork is planned for stitches. A clean design can still stitch poorly if the file has the wrong stitch type, too much density, or poor stitch order. That is why choosing a skilled digitizer can make a big difference in the final result.
If you are looking for Best Embroidery Digitizing Services, look for a team that knows how artwork, fabric, thread, and machine settings work together. A good service does more than turn a picture into a machine file. It builds a stitch plan that fits the design and the item you want to embroider. This can help reduce thread breaks, gaps, puckering, and lost detail.
What Is Embroidery Digitizing?
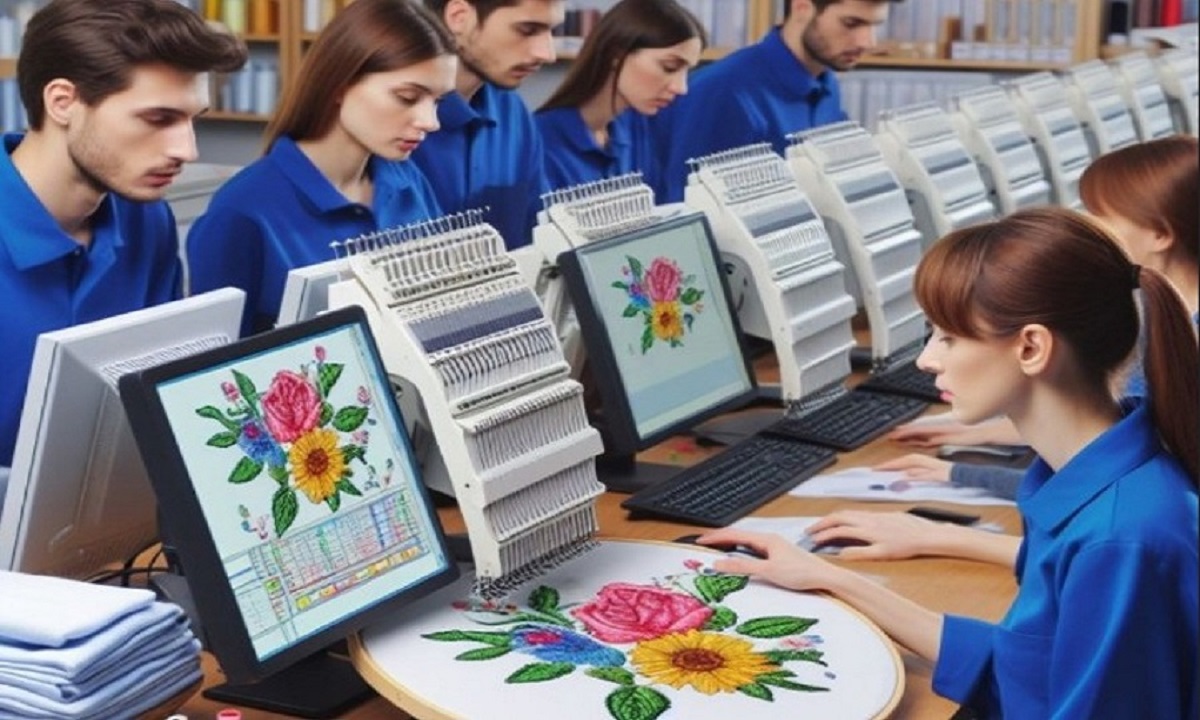
Embroidery digitizing is the process of turning artwork into stitch data.
A normal image uses pixels or shapes. An embroidery machine needs instructions that tell it where to move and stitch.
A digitized file can include:
- Stitch paths
- Stitch types
- Stitch density
- Stitch direction
- Thread colors
- Color changes
- Stitch order
- Trim points
- Design size
The final file must also match the embroidery machine and its supported format.
Why Good Digitizing Matters
A poor file may look fine on a screen but fail during stitching.
You may see:
- Uneven edges
- Gaps
- Thread breaks
- Heavy areas
- Fabric puckering
- Poor lettering
- Lost small details
Good digitizing helps turn artwork into a design that works in the real world.
Start With Good Artwork
The source artwork is the first step.
A clear logo or image gives the digitizer more information. A small, blurry image may need more work before it can be used.
Try to provide:
- Clear artwork
- Correct colors
- Large images when possible
- Vector artwork if available
- Final design size
- Fabric type
- Machine type
- Hoop size
The more useful the source file is, the easier it is to plan the stitches.
Look at the Service’s Past Work
A portfolio can tell you a lot.
Do not look only at the artwork on a computer. Look for photos of real embroidery.
Check the Small Details
Look at:
- Lettering
- Curves
- Borders
- Small shapes
- Large filled areas
- Color changes
The stitches should look even and clean.
Look at Different Products
A good digitizer should understand that a shirt is not the same as a cap.
Different products can need different stitch plans.
For example, caps have a curved surface. Jackets may be thick. Soft shirts can move more during stitching.
A strong portfolio should show work on several types of items.
Ask About Machine Compatibility
Your embroidery machine matters.
Different machines can use different file formats. Even machines from the same brand may have different hoop limits or software needs.
Before ordering, share:
- Machine brand
- Exact model
- Required file format
- Hoop size
- Final design size
This helps the digitizer prepare the right file.
Do Not Guess the File Format
Do not assume that one format will work for every machine.
Check your machine manual or software guide first.
A good digitizing service should also ask about your machine instead of guessing.
Check Their Stitch Knowledge
Good digitizing requires more than software skills.
The digitizer should understand how stitches behave on fabric.
Satin Stitches
Satin stitches work well for narrow shapes, borders, and some lettering.
They can give a smooth look when the width and density are right.
Fill Stitches
Fill stitches are useful for larger areas.
The stitch direction can be changed to improve coverage and appearance.
Running Stitches
Running stitches work well for thin lines and some fine details.
Using too many thin lines can make the design hard to read, so each area needs careful planning.
Ask About Stitch Density
Stitch density is very important.
Too many stitches can make an area too heavy. This may cause thread breaks or puckering.
Too few stitches can leave gaps.
The right density depends on:
- Fabric
- Thread
- Design size
- Stitch type
- Design shape
A skilled digitizer changes density based on the project.
More Stitches Do Not Always Mean Better Quality
This is a common mistake.
Adding more stitches does not always add more detail.
Sometimes fewer, better-placed stitches create a cleaner result.
This is especially true for small logos and lettering.
Check the Underlay
Underlay is the base layer under the main stitches.
It helps support the top stitches and can help control the fabric.
Good underlay can improve:
- Stability
- Coverage
- Shape
- Stitch quality
Too much underlay can make the design thick. Too little may not provide enough support.
The setting should match the fabric and design.
Pay Attention to Stitch Direction
Stitch direction affects the look of the finished design.
A good digitizer can change stitch direction to follow the shape of the artwork.
This is useful for:
- Curved logos
- Leaves
- Letters
- Large shapes
- Pet designs
Good direction can also make the thread reflect light in a more pleasing way.
Pull Compensation Matters
Fabric can move as stitches pull on it.
This may cause small gaps or changes in shape.
Pull compensation helps balance the effect.
It is often important for:
- Small letters
- Rounded shapes
- Narrow borders
- Areas where shapes meet
The right amount depends on the fabric and stitch plan.
Ask About Small Lettering
Small text can be one of the hardest parts of embroidery.
Tiny letters can fill with thread and become hard to read.
Use Simple Fonts
A simple font with enough space often works better.
Very thin letters may need wider strokes.
The final size should always be checked before production.
Test Small Text
If the design has names, dates, or small words, ask for a test stitch.
A screen preview may not show how small text will look on fabric.
Consider the Fabric
The same file may not work equally well on every fabric.
A digitizer should know where the design will be stitched.
Tell them if the design is for:
- Cotton
- Denim
- Fleece
- Canvas
- Jackets
- Caps
- Bags
- Patches
This helps them choose better stitch settings.
Ask for a Test Stitch
A test stitch is a key part of quality control.
It shows how the file works on real fabric.
Check the Sample
Look for:
- Thread breaks
- Gaps
- Puckering
- Poor coverage
- Uneven edges
- Lost details
- Bad lettering
- Wrong color order
If something looks wrong, the file can be changed before full production.
Check the Revision Policy
Even a good file may need a small change.
The test stitch can show that a letter is too small or that one area needs less density.
Ask the service:
- Are revisions included?
- How many changes are allowed?
- Can the file be adjusted after testing?
- Is there a charge for major changes?
Clear terms can prevent confusion later.
Ask About Turnaround Time
Speed matters when you have an order due soon.
But fast work should not mean careless work.
Ask for a clear delivery time before placing the order.
For urgent jobs, tell the digitizer your deadline at the start.
Compare Price With Value
The cheapest service may not be the best choice.
A poor file can lead to:
- Wasted thread
- Damaged fabric
- Extra machine time
- Rework
- Missed deadlines
A well-made file may cost more at first but save money during production.
What Should the Price Include?
Ask what you receive.
For example:
- Final machine file
- Original editable file, if offered
- Revisions
- Test support
- Multiple formats
- Color changes
Do not compare prices without checking what is included.
Watch for Red Flags
Be careful if a service:
- Has no real samples
- Gives unclear file details
- Does not ask about your machine
- Promises perfect results without testing
- Uses the same settings for every fabric
- Gives very vague turnaround times
- Does not explain revisions
A professional service should be willing to answer basic questions.
Choose a Service That Communicates Well
Good communication makes the whole process easier.
A skilled digitizer should be able to explain why a design needs changes.
They should also listen to your needs.
Absolute Digitizer focuses on careful embroidery file preparation with attention to design size, stitch settings, fabric, and machine needs. Clear communication can help make sure the final file matches the project.
A Simple Checklist
Before choosing a service, ask these ten questions:
- Can I see real embroidery samples?
- Do you know my machine format?
- Can you work with my fabric?
- How do you handle small lettering?
- Do you adjust stitch density?
- Do you use suitable underlay?
- Can I request revisions?
- Do you support test stitching?
- What is the turnaround time?
- What is included in the price?
If the answers are clear, you are off to a good start.
Final Thoughts
Choosing a good embroidery digitizing service can have a big effect on your final product. The right service does not simply convert artwork into a file. It plans stitches based on the artwork, fabric, machine, size, and production needs.
Look at real samples. Ask about machine formats. Check how the service handles density, underlay, stitch direction, and small text. Most of all, ask for a test stitch when the project is important.
Absolute Digitizer can help prepare clean embroidery files for logos, apparel, caps, patches, bags, and other projects. With good artwork, skilled digitizing, and proper testing, you can move from artwork to clean stitches with fewer production problems and more consistent results.