Turning a photo, logo, or piece of artwork into embroidery takes more than saving it in a new file type. An embroidery machine needs stitch data, not just an image. The design must be planned so the stitches follow the shapes, cover the fabric, and keep key details clear. Good planning also helps reduce thread breaks, gaps, and puckering.
If you want to turn your image into a Bernette embroidery file, the artwork should first be prepared for machine stitching. A skilled digitizer studies the image and turns its main shapes into stitches. Stitch type, density, underlay, stitch direction, and color order all need care. The file should also match your Bernette machine, hoop, fabric, and final design size. This helps keep the artwork clear while making the file ready for embroidery.
What Does It Mean to Turn an Image Into an Embroidery File?
A JPG, PNG, or similar image is made of pixels. An embroidery machine does not read those pixels as stitches.
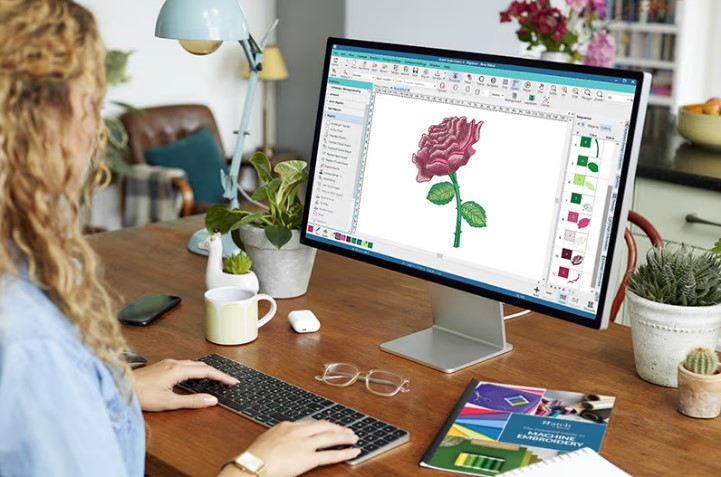
The image must first be digitized. This means the artwork is mapped into stitch paths that the machine can follow.
The file may include details such as:
- Stitch paths
- Stitch types
- Stitch density
- Thread colors
- Color changes
- Stitch order
- Design size
- Trim points
The exact file format needed can depend on the Bernette machine and software you use. Always check the manual or software guide for your model before preparing the final file.
Start With Clear Artwork
The quality of the source image affects the work that follows.
A clear logo or high-quality image gives the digitizer more information. A small or blurry image may hide important lines and shapes.
Before starting, try to provide:
- A clear image
- A vector file if available
- Correct colors
- Final design size
- Fabric type
- Hoop size
- Machine model
- Required file format
These details help the digitizer make better choices.
Clean Up the Image First
An image may contain shadows, marks, or tiny details that will not work well with thread.
Some parts may need to be removed or simplified. The goal is not to change the main look. It is to make the design work in real stitches.
Image Conversion Is Not Just File Saving
Changing an image extension does not make it an embroidery file.
For example, changing a JPG name to an embroidery format will not create usable stitch data.
The artwork must be digitized with suitable embroidery software or prepared by a professional digitizer.
Conversion vs. Digitizing
These terms are sometimes mixed up.
Conversion usually means changing an existing embroidery file from one machine format to another.
Digitizing means creating stitch data from artwork.
If you start with a normal image, you need a digitizing process before the machine can stitch it.
Choose the Right Stitch Types
Different areas of a design need different stitches.
Satin Stitches
Satin stitches work well for narrow shapes, borders, and some types of lettering.
They can give a smooth finish when the width and density are right.
Fill Stitches
Fill stitches cover larger areas.
The stitch direction can be changed to improve coverage and give the design a balanced look.
Running Stitches
Running stitches are useful for thin lines and some small details.
They use less thread and can help keep fine areas from becoming too heavy.
Keep Stitch Density Balanced
Stitch density is the amount of space between stitches.
Too much density can make the design heavy. It may also cause thread breaks and fabric puckering.
Too little density can leave gaps. The fabric may show through areas that should have good coverage.
The best setting depends on the design, fabric, thread, and size.
Do Not Use the Same Settings for Every Fabric
A soft shirt does not behave like a thick jacket.
A cap also has different needs because it has a curved surface.
A good digitizer adjusts the stitch plan for the material instead of using one setting for every job.
Use Proper Underlay
Underlay is a base layer placed beneath the main stitches.
It can help hold the fabric in place and support the top stitches.
Good underlay can help with:
- Stitch stability
- Fabric control
- Coverage
- Shape
- Small details
Too much underlay can make the design bulky. Too little may not give the top stitches enough support.
Plan Stitch Direction
Stitch direction affects the look of the finished embroidery.
A digitizer may change the direction in different areas so the stitches follow the shape of the artwork.
This can help large areas look smoother. It can also improve the way light reflects from the thread.
Good stitch direction is especially useful for logos with curves, leaves, letters, and other shaped parts.
Use Pull Compensation
Thread can pull the fabric as the machine stitches.
This can cause gaps or make some shapes look smaller than expected.
Pull compensation helps balance this effect.
It is often important for:
- Small letters
- Rounded shapes
- Narrow borders
- Fine details
- Areas where two sections meet
The right amount depends on the fabric and stitch plan.
Protect Small Details
One of the hardest parts of turning an image into embroidery is keeping small details.
Thread cannot copy every tiny line in a photo.
Simplify Fine Lines
Very thin lines may need to be made wider or removed.
This may sound like a loss of detail, but it can actually make the finished embroidery look clearer.
Make Small Text Easy to Read
Tiny letters can fill with thread. A simple font with enough space can work better.
The final size matters too. A design that looks clear at six inches may not work at two inches.
Match the Bernette Hoop
Before the final file is made, check the hoop size.
The design must fit inside the sewable area.
A file that is too large may not fit. A design that is made too small may lose important details.
Tell the digitizer the exact hoop and final size whenever possible.
Check the Thread Colors
Colors can look different on a screen than they do in thread.
The digitized file should have a clear color order. You should also check which thread brand and color chart will be used.
For business logos, this is very important. Brand colors should be matched as closely as practical.
Test the Design Before Production
A preview can show the stitch plan, but a real test stitch gives more useful information.
Use fabric that is close to the material used for the final product.
Look for These Issues
During the test, check for:
- Thread breaks
- Gaps
- Puckering
- Poor coverage
- Uneven edges
- Lost details
- Hard-to-read text
- Wrong color changes
If you find a problem, fix the file before starting a large order.
Choose a Reliable Digitizing Service
If you do not have the tools or skills to digitize the artwork, professional help can save time.
Review Past Work
Ask to see real embroidery samples.
Look for:
- Clean lettering
- Smooth curves
- Even fills
- Sharp borders
- Good detail
- Balanced stitch coverage
A good portfolio should show work on more than one type of product.
Share Full Project Details
Give the digitizer the information they need.
Include:
- Bernette machine model
- Required file format
- Hoop size
- Design size
- Fabric
- Thread type
- Design placement
- Production deadline
Clear details can help prevent avoidable changes later.
Ask About Revisions
A test stitch may show that a part needs more work.
Ask if revisions are included. A clear revision policy can make the process easier.
Common Mistakes to Avoid
Using a Blurry Image
Poor artwork can make accurate digitizing harder.
Adding Too Much Detail
Tiny details may not stitch clearly.
Ignoring the Fabric
The same file may not work equally well on every material.
Skipping the Test Stitch
A test can reveal problems before production.
Forgetting Machine Compatibility
Always confirm that the final file works with your Bernette model and software.
How Professional Digitizing Helps
Professional digitizing can save time and reduce production issues.
Absolute Digitizing helps prepare artwork and embroidery files with factors such as fabric, size, stitch quality, and machine use in mind. Careful file preparation can help create cleaner designs for shirts, caps, jackets, uniforms, bags, patches, and other products.
The goal is not just to make a file that opens. The goal is to make a file that stitches well.
A Simple Quality Checklist
Before production, check these points:
- Is the source image clear?
- Has unwanted detail been removed?
- Is the design the correct size?
- Does it fit the hoop?
- Is the file right for the Bernette machine?
- Is stitch density balanced?
- Is the underlay suitable?
- Are thread colors correct?
- Has the file been tested?
- Does the sample look clean?
Final Thoughts
Turning an image into a Bernette embroidery file takes careful planning. A simple image must become a clear stitch plan that the machine can follow.
Good digitizing considers stitch type, density, underlay, direction, pull compensation, color order, fabric, hoop size, and final design size. It also gives special care to small text and fine details.
A test stitch is one of the best ways to check the real result before production. If the file needs changes, making them early can save thread, fabric, time, and money.
Absolute Digitizing can help with professional embroidery file preparation when you need a clean and reliable result. With the right artwork, careful digitizing, and proper testing, you can keep the important details of your design while getting smooth and consistent embroidery.